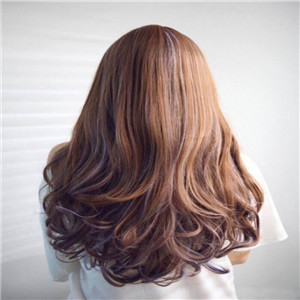
One of the most popular hair pieces is lace front wigs. Lace front wigs are in high demand because of its natural appearance.Lace front wigs are the most highly welcomed human hair wigs by black women. In most cases, human hair lace front wigs have become the essential accessories of beautiful women, no matter for parties, for vacations, or for other formal or commemorative events.
But many people feel it is a little expensive to buy finished human lace front wigs from human hair supplier, everyone wants to have the cheap lace front wigs, is there a good method to solve this problem?
Yes, this article will show you how to make cheap human hair lace front wigs with the highest quality by yourself.
- 1.What are lace front wig?
- 2.Procedure of making lace front wigs step by step
- 3.How to make your lace front wig looks realistic?
- 4.How to make lace front wigs last longer?
What are lace front wig?
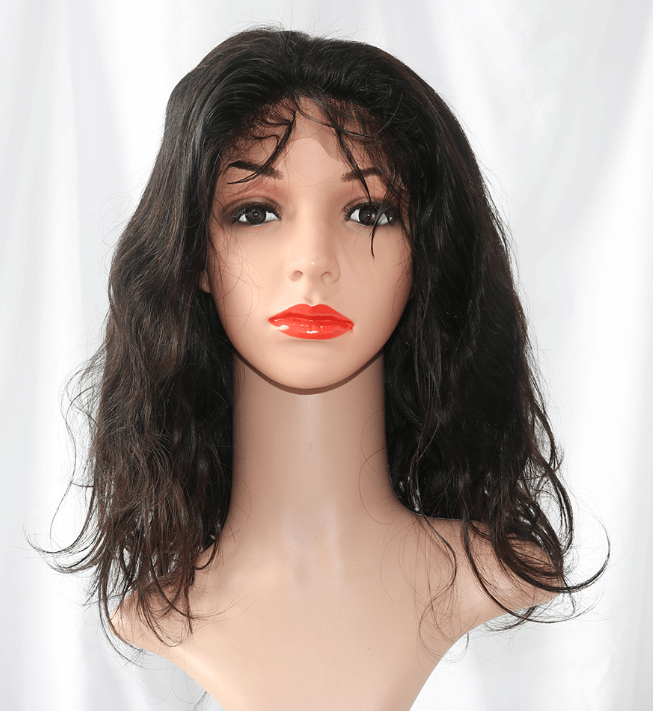
Lace frontal wigs or lace front wigs, as they are sometimes called, are a variation of Lace Wigs which are sewed by human hair bundles withlace frontals. They are extremely popular among our clients and among people who wear wigs in general. Lace wigs can be classified by their mesh appearance that adds a greater realism to your wig. Lace frontal wigs are so named because the sheer lace that makes up the wig is located in the front part (the part that rests on the forehead) of the wig. These lace front wigs are ideal and extremely popular because it will appear as if you have a natural hairline in front, even if you are wearing a front lace wig.Wearing lace front wigs is very simple because they are stretchy and cover the entire scalp area and gives the appearance of a natural hairline.
Procedure of making lace front wigs step by step
Step One

First, you’ll take the white pencil from your kit and mark out the position of your ears on the wig cap before placing it on the mannequin. This will serve as a guide to help you know the exact spot to set your frontal lace.
Place the wig cap on the mannequin head and hold down with a pin. Place the wig cap out because you need the cap hook to be on the outside.

Using the customized lace front wig, you’ll start by securing the lace on the tips where you’ve marked on the wig cap. Remember to fold the lace before you start sewing to get a clean finish.
Use the clip to move the hair out of the way for an easy sew. It is best to start sewing from both ends of the edges of the frontal row before sewing from the back. This is done to help keep the front row in place for a natural hairline.
I’ll advise you sew with a blanket stitch method for a neat finishing. You can do this by sewing under the lace then over, about half a centimeter apart and repeat the process all the way. Always ensure your stitches are straight to achieve a neat outcome.
Step Two
Next is sewing the bundles. First, you’ll have to adjust the wig cap properly and pin it to the mannequin using the pins. This allows for easy a sew.
The number of bundles used for making the lace front wig varies with individuals, for most people four bundles will do the trick, while for others with three bundles they’re good to go.
If you like your finished lace front wig to be long. It’s important you double your thread and weft, when sewing from the back for a firm and secure grip.
You begin your back sewing by putting the needle through the web of your wig cap and tie a knot so your stitches remain intact and secured.

Now, take your time with the lace sewing, using the blanket stitch method. Remember to use the longest length (20 inches) when sewing the bundle at the back.
Ensure to sew each track relatively close to each other to enable you to achieve enough hair volume at the back and help avoid the finished wig looking scanty, thin, and artificial.
When you get to the edge of the wig cap, you’ll need to use a fold off method if the lace is still long enough. But if it’s short, you’ll make a knot and carefully cut off the what is left of the lace.
Step Three
For the fold off method, you’ll open up the double track, sew through the first web, and sew on the second track directly on its top. Then fold over the track and sew through all the weft together. You’ll be required to repeat the process to prevent bumps and keep the lace flat.
It’s normal for first timers to encounter difficulty sewing on a straight line. To help avoid this difficulty, you can place your lace on the path you want to sew with some pins and use the pencil to outline where you need to sew. This also makes the sewing easier.
As you approach the top of the wig, you’ll notice your sewing lines will begin to curve; you don’t need to straighten it, continue sewing in curved lines.
Note: The tracks at the top near the frontals and the tracks at the back are sewn relatively close, while tracks at the middle are sewn a finger width apart.
To finish up the track, sew through the weft twice and conclude with a knot, I’ll recommend you double knot for a stronger grip.
Step Four
Now your wig is almost ready, take wig cap off the mannequin head and cut off excesses from the cap peeking under your frontal lace. Ensure not to cut into your stitching and also avoid cutting too close to the hair.
Turn out the inside of your cap and sew in your combs. The combs are sewn inside the wig cap to secure and add firmness to your wig. Preferably, there should be a comb or two at each side of the head (the front, the middle, and the back).

Using the elastic band from your kit, stretch the wig band from one ear to the other to get your accurate head measurement. Mark out your ear points with the pencil and cut your head length from the elastic band.
Sew the band to your wig cap from edge to edge for a secure and tight lace front wig, ensure to always double your thread and knot twice for a secure grip.
At this point, your lace front wig is ready for styling. Style your newly made lace front wig to any style of your choice, and you’re good to add to your glow and put up that shiny natural appearance with your lace front wig for black.

How to make your lace front wig looks realistic?
Follow a few of our suggestions to make your wigs look more realistic and natural.
Step1: Bleach the knots. Many wigs are already bleached and pre-plucked; if the knots have not been bleached, it is suggested that you do it for a seamless and more realistic look. Bleaching the knots helps to improve the appearance of the hairline. However, if you are not careful, you can damage the hair, weaken the roots, and lessen the lace’s durability. Things you will need:
Bleach
- Rubber Gloves
- Mixing Bowl and Spatula
- Flat Application Brush
- Canvas Head
- Plastic Cap
- T-pins
- Plastic bowl
Step #2: Use gloves when mixing chemicals. Mix equal parts bleach and developer in a mixing bowl. The mixture should be thick when you apply the mixture to the front of your lace front wig and the front and back of your full lace wig, using the application brush to make sure the bleach doesn’t seep through. Your mixture should not be runny if it is, put some more powder in it.
Step #2a: Turn your full or lace frontal wig inside the cap out and place onto a canvas head and secure it with T-pins. I suggest putting a plastic cap onto the canvas first. Use the applicator brush to apply a minimal amount of the mix onto the knots, starting from the front of the wig and move back systematically to avoid missing any knots. Let the mixture sit as per the manufacturer’s directions (10-15- minutes) and rinse the areas where you’ve bleached thoroughly with cold water.
Step 2b: Remove the plastic cap from the mannequin and place the wig onto it, to air dry.
Step 3: After the hair has dried, it is time to create a natural and realistic hairline. Many companies sell pre-plucked wigs, but they still need some customization to suit your preference. Things you will need:
- Tweezers
- Mousse
- Canvas or Styrofoam Head
- T-pins
- Butterfly Clips
- Comb
- Scissors or Razor
- Blow Dryer
- Edge Control
- Edge Brush or Toothbrush
- Blasting Freeze Hair Spray
- Edge Wrap Strip

Step 3a: Place the wig on your head. Placement of the lace is critical. Some people place their wigs way above their hairline, which makes it look fake. We suggest placing the lace wig closer to your natural hairline. Once you are satisfied with the placement, place the wig back onto the canvas head or and secure with T-pins.
Step 3b: Butterfly clips help push back the excess hair so you can concentrate on the areas you would like to pluck. Use tweezers to pluck to thin out the hairline to give it a natural look. When plucking makes sure to do it fast and don’t stay in one spot. You don’t want to have bald spots. The natural hairline will appear as the hair thins out from the hairline.
Step #4: You’re almost done. Now try the wig on your head and make sure it looks natural. If you need to do some additional plucking, you can do it while it is on your head to customize it further. Now it is time to set your baby hairs.
Step 5: Most wigs come with baby hair; if not, you can make your own. Either way, you will want to customize it. You will need to trim the lace first using sharp scissors or razors. You don’t want to cut off too much lace and ruin your investment. Take your time and do it small sections with a steady hand. You want to cut close to the hairline without cutting the hair.
Step 5a: Clip your hair on both sides of the wig and create a natural part, either a middle or side part. After I decide where I want the part to be, I use a little mousse to make it easier to manage.
Step 5b: Use mousse and edge control to lay down your baby with a comb or edge brush or toothbrush. I’ve used Eco Styler Gel and Gorilla Snot, both works. I then spray Freeze Hair Spray and blow-dry. I wrap the edge wrap strip around my head and let it sit for 10-15 minutes if I am doing my hair during the day. If it is at night, I wrap my hair with silk or satin scarf and remove the wrap in the morning.
Step 6: Now, it is time to style your hair. Oftentimes, you will need to tint or use make-up to polish off the look. I’ve used make-up and tint spray. I prefer using the tinted spray, which I make using Rit Fabric dye in dark brown and water. I have it a spray bottle, and I just spray it own the lace, along with Blasting Freeze Hairspray. I use a blow dryer to set the tint and go about my business.
How to make lace front wigs last longer?
Scrub before going to bed and before washing to ensure there is no wind or friction caused by naturally occurring kinks. Do not brush wet hair when the follicles are at their weakest. Use an organic free shampoo for your wigs and the lace area. Sulfate strips hair from its natural oils, and since the scalp does not have direct nutrients going into the hair’s extensions, it is important to use a sulfate-free shampoo to avoid dry hair finally. To avoid damage to hair extensions or the lace wigs, cuticle and scalp, wash only with warm water. Wash your hair gently down with the palms of your hands. Do not rub your hair together as this will cause the open cuticles to rub against each other. Clean only 1-2 times between each cleaning, not too much, not too less, that is fine for your human hair wigs.
When moist the hair strings of your Swiss lace and the wig, add 2-3 drops of natural oil, such as almonds or coconut, and gently apply evenly to the hair. Natural oils do the job most regulators do without adding chemicals and silicone, and nature is always best. Finally, lower the shower head and rinse your hair (not your scalp) with cold water. This is called an arctic rinse. It closes the cuticle, locks in the moisture and nutrients in the oil, and gives you a nutrient-rich hair stretch.
Leave your hair to air dry at home, wash for 2-3 hours and blow-dry your hair naturally – do not use heat as this will cause your hair to swell and dry. Apply a small amount of alpha glycerin, almond or coconut oil 2 to 3 times a week or as needed. A glycerin is a good finishing oil for styling and curling, but it is a dry oil that does not moisturize the hair like almonds or coconut. For lasting the human hair extensions, moisturize your hair weaving as you do your skin, which is the perfect meaning.